Creating and editing Campaign Plus templates
Once clicking ‘Campaign design’ you will be taken to a page that looks like the below.
There are pre-built templates under each of the campaign heading so you can use one of these templates if it matches what your campaign is about.
|
Some pre-built campaign templates will have multiply media types. We can send postcards, letters, SMS and emails through campaign plus. Emails are free, however letters, postcards and SMS have an additional cost. Your marketing consultant will go over pricing with you for these |
- Editing campaign templates
- Template design
- Block types
- Title and text blocks
- Uploading an image
- Button block
- Footer bar
- Toolbox options
- Finishing your template
Editing campaign templates
video example
Example of selecting a campaign template, deleting one of the media types and changing the sending days:
Please pay attention to the ‘Day’ section on this page after deleting any other media templates from a campaign. This is the day that the campaign media will send to the patient on.
I.E. if set to day 5 like in the image, the email will send 5 days after the patient meets the criteria of the contact list and may cause problems for the campaign sending.
To change this, simply delete the number and type ‘1’ into the box instead to change this to send out on the first day of the campaign.
Once this is done, click ‘Edit’ to go into the template design.
Template design
The pre-built templates on the campaign plus system will already have layouts, images and wording.
These are fully editable so you can change the wording and images but not the layout on these templates.
If you like to create your own templates, with customised layouts. You can use the template that is under the ‘Newsletter’ heading
This will take you to a completely blank template, which supplies every block available through Campaign Plus. The best way to work with this template is from top to bottom. We would advise to keep all blocks in the template until the end and not delete them at the beginning.
|
This is because, if you delete some of the blocks, do your wordings etc. and then decide you want one of the blocks you deleted back, you cannot get this back without undoing everything you have just created. |
This block should show your practice logo automatically when you enter the templates.
If it is not there, please send us a copy of your logo and we will add this to the system for you.
Block types
Below are all the types of blocks within Campaign Plus and what they can be used for:
Small/ Medium image
Large Image
Two medium images together
Large image with title, text and link button
Two images with title, text and link buttons
Three images with titles, text and link buttons
Left and right formatted images with titles, text and link buttons
Title and text blocks
The title and text blocks are very simple to use, like any text block, just click and type your wording into the blocks. You can copy and paste wording into these blocks from other sources.
Some image blocks, like shown above, have title and text options with them, these are used in the same way.
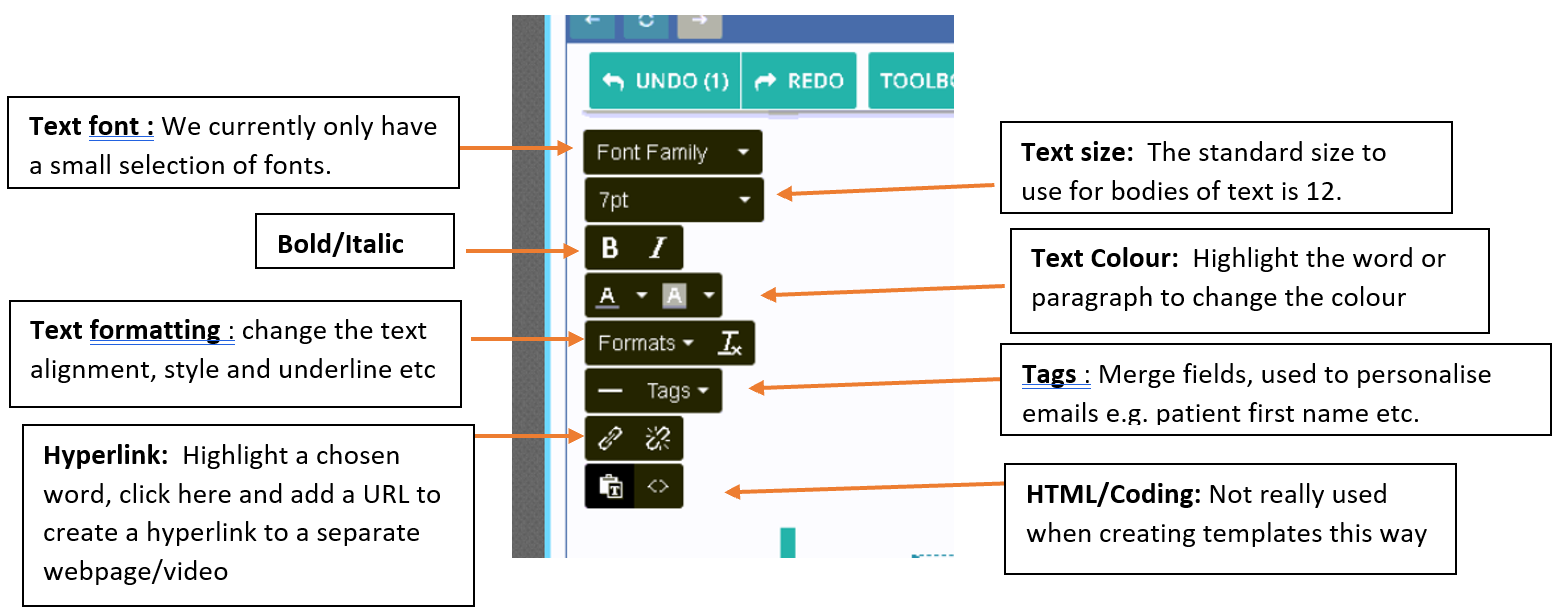
When clicking on title and text blocks, this panel will show on the left hand side. This is used for you text formatting, you will need to highlight your section of text you would like to change using the below options.
See below for what each one does:
Uploading an image
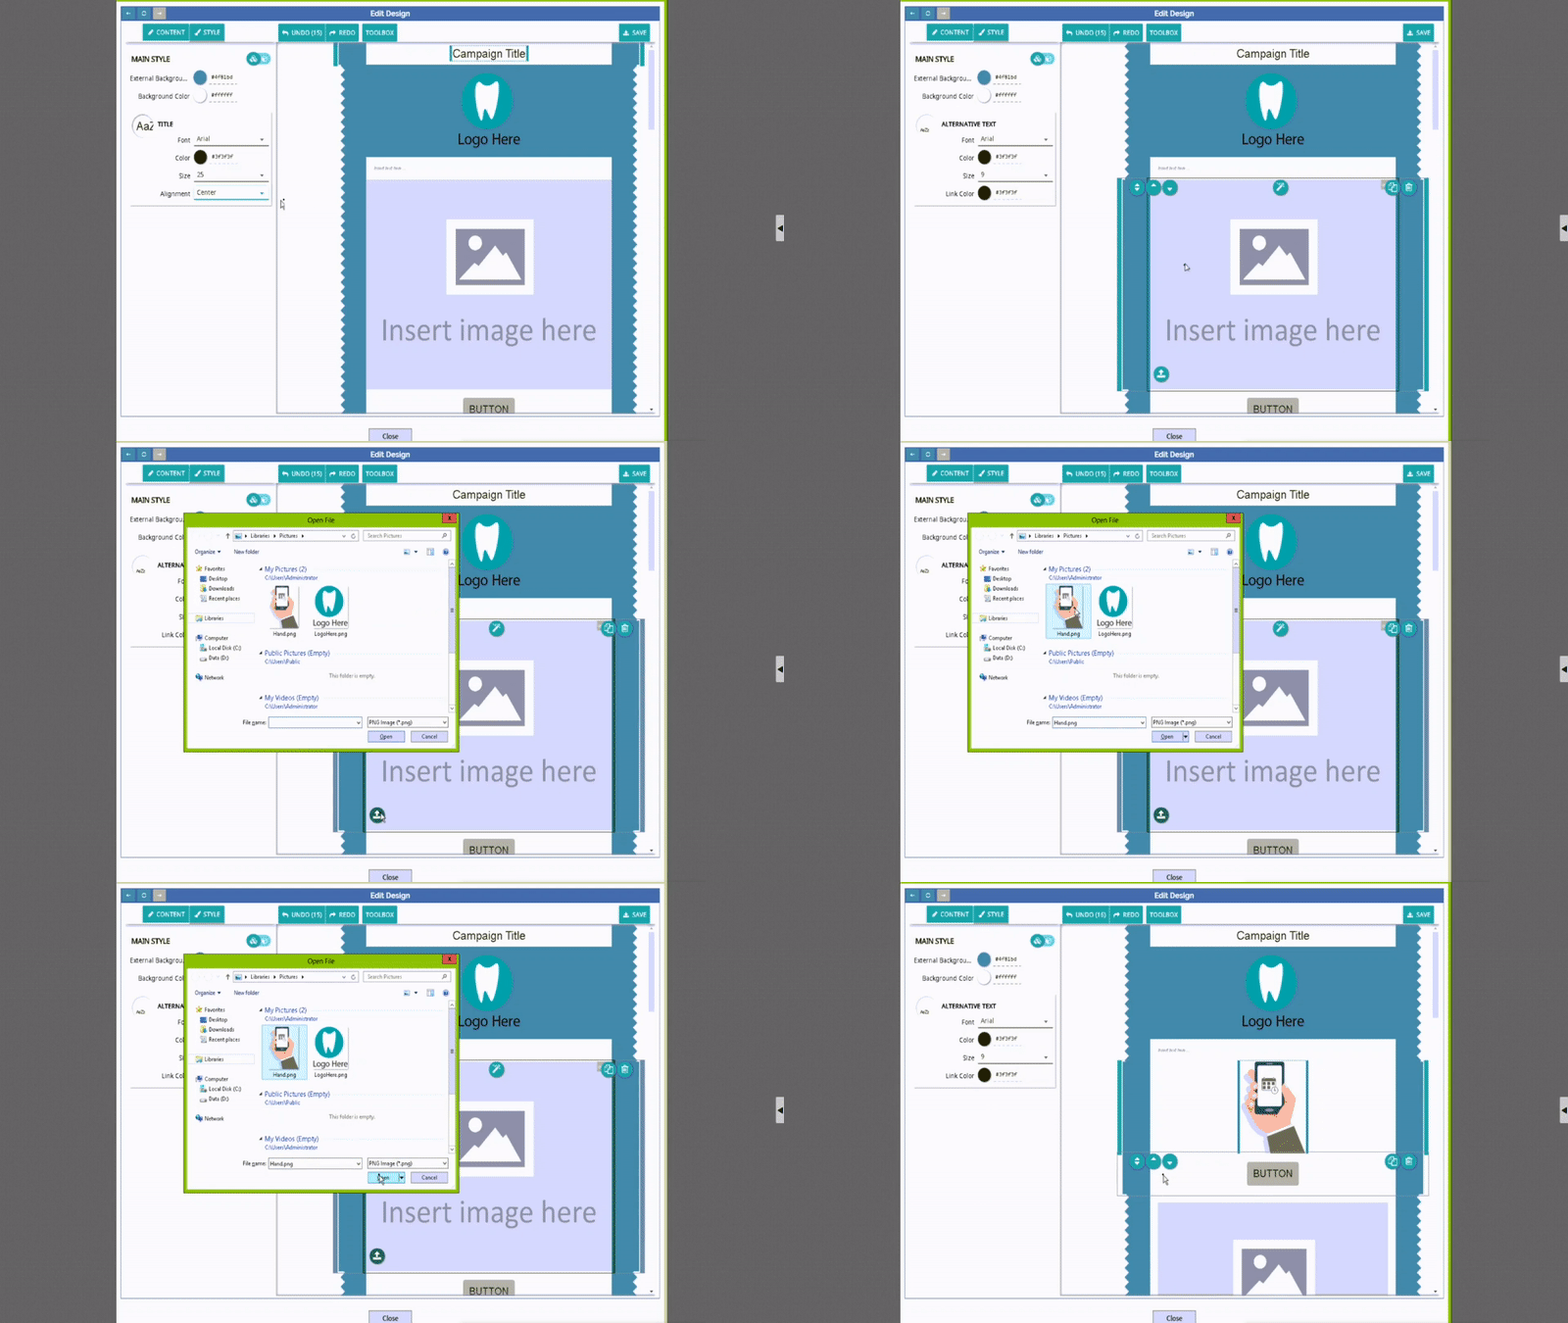
Hover over the image block and click the button in the bottom left corner (as shown below) this will open up your desktop files. Locate your chosen image and click open.You will only be able to use PNG and JPEG files, which are under 1MB in size, for the images. You cannot copy and paste images.
Button block
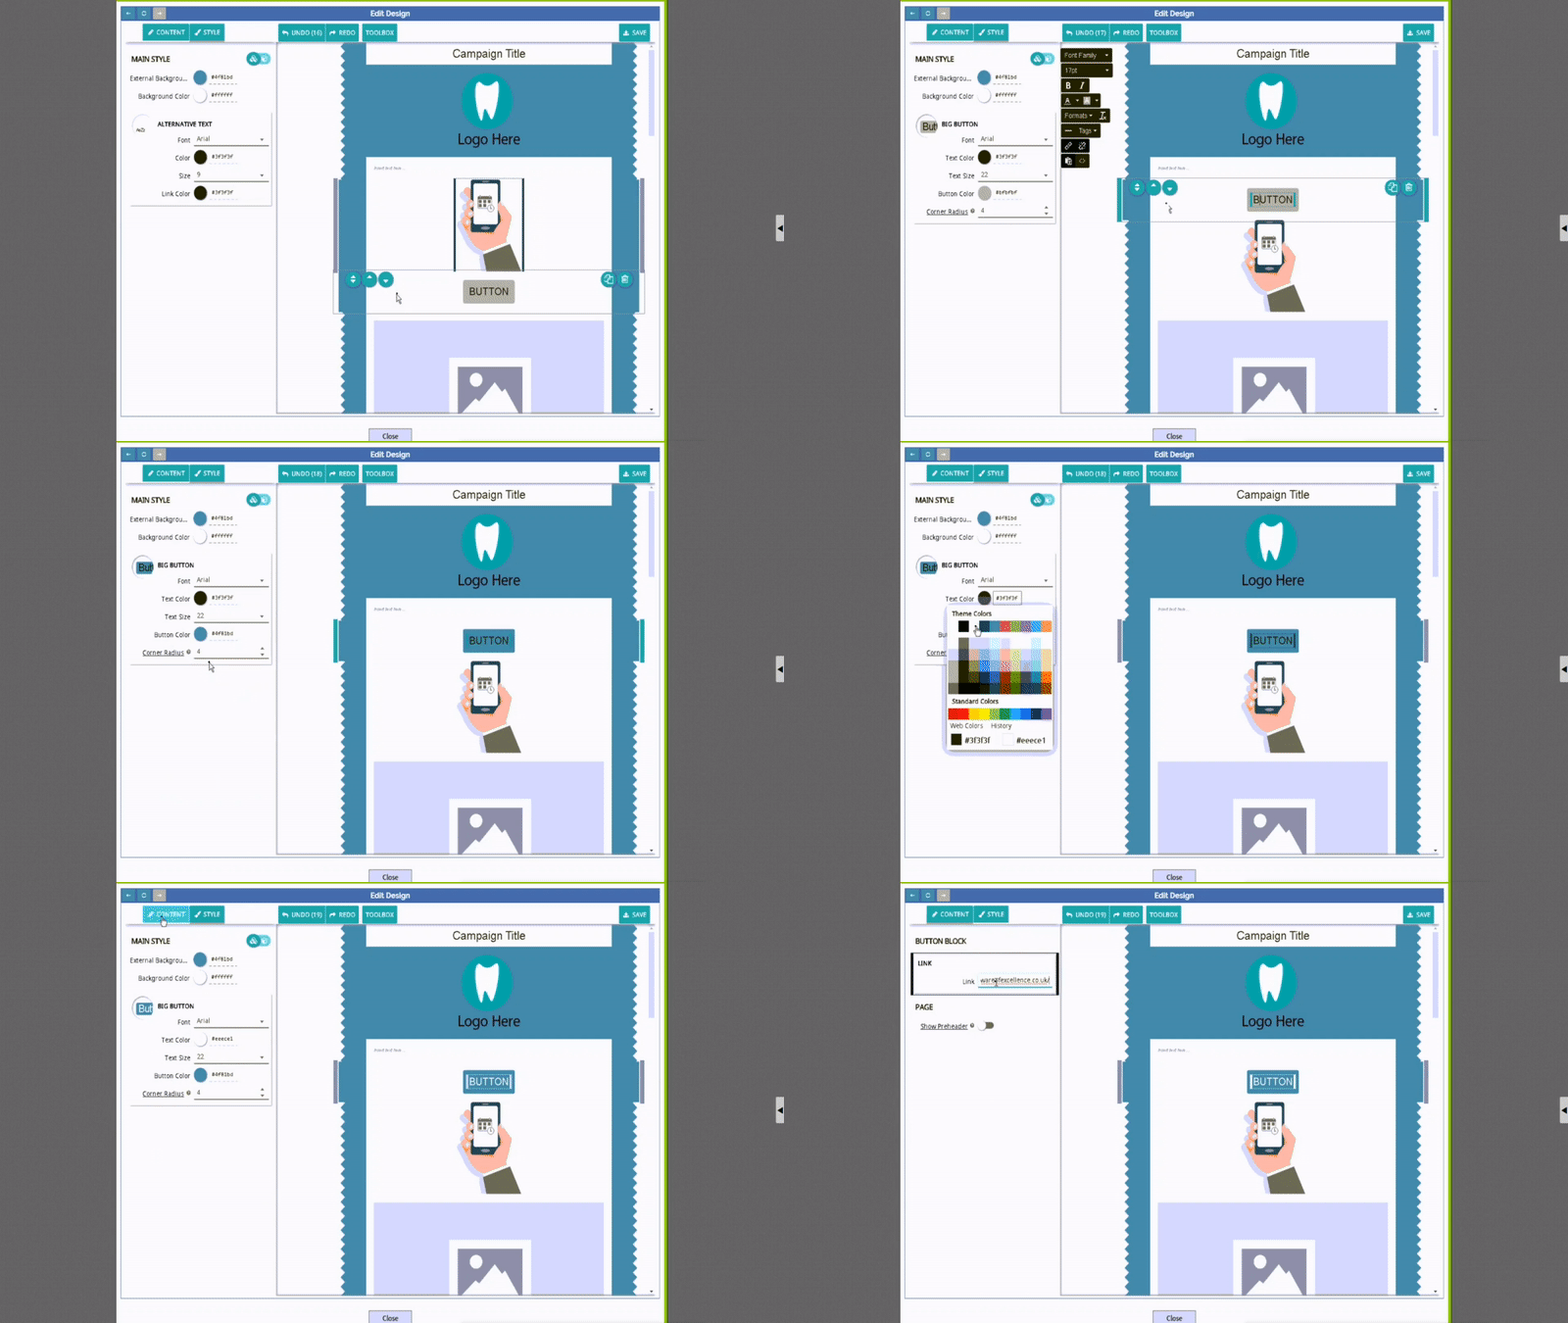
Button blocks can be used to link patients to external pages on websites, youtube videos, internet hosted PDF documents. Please see the above steps on how to add a link to a button.
The text on the button can also be changed to reflect what link is there e.g. website, youtube
Footer bar
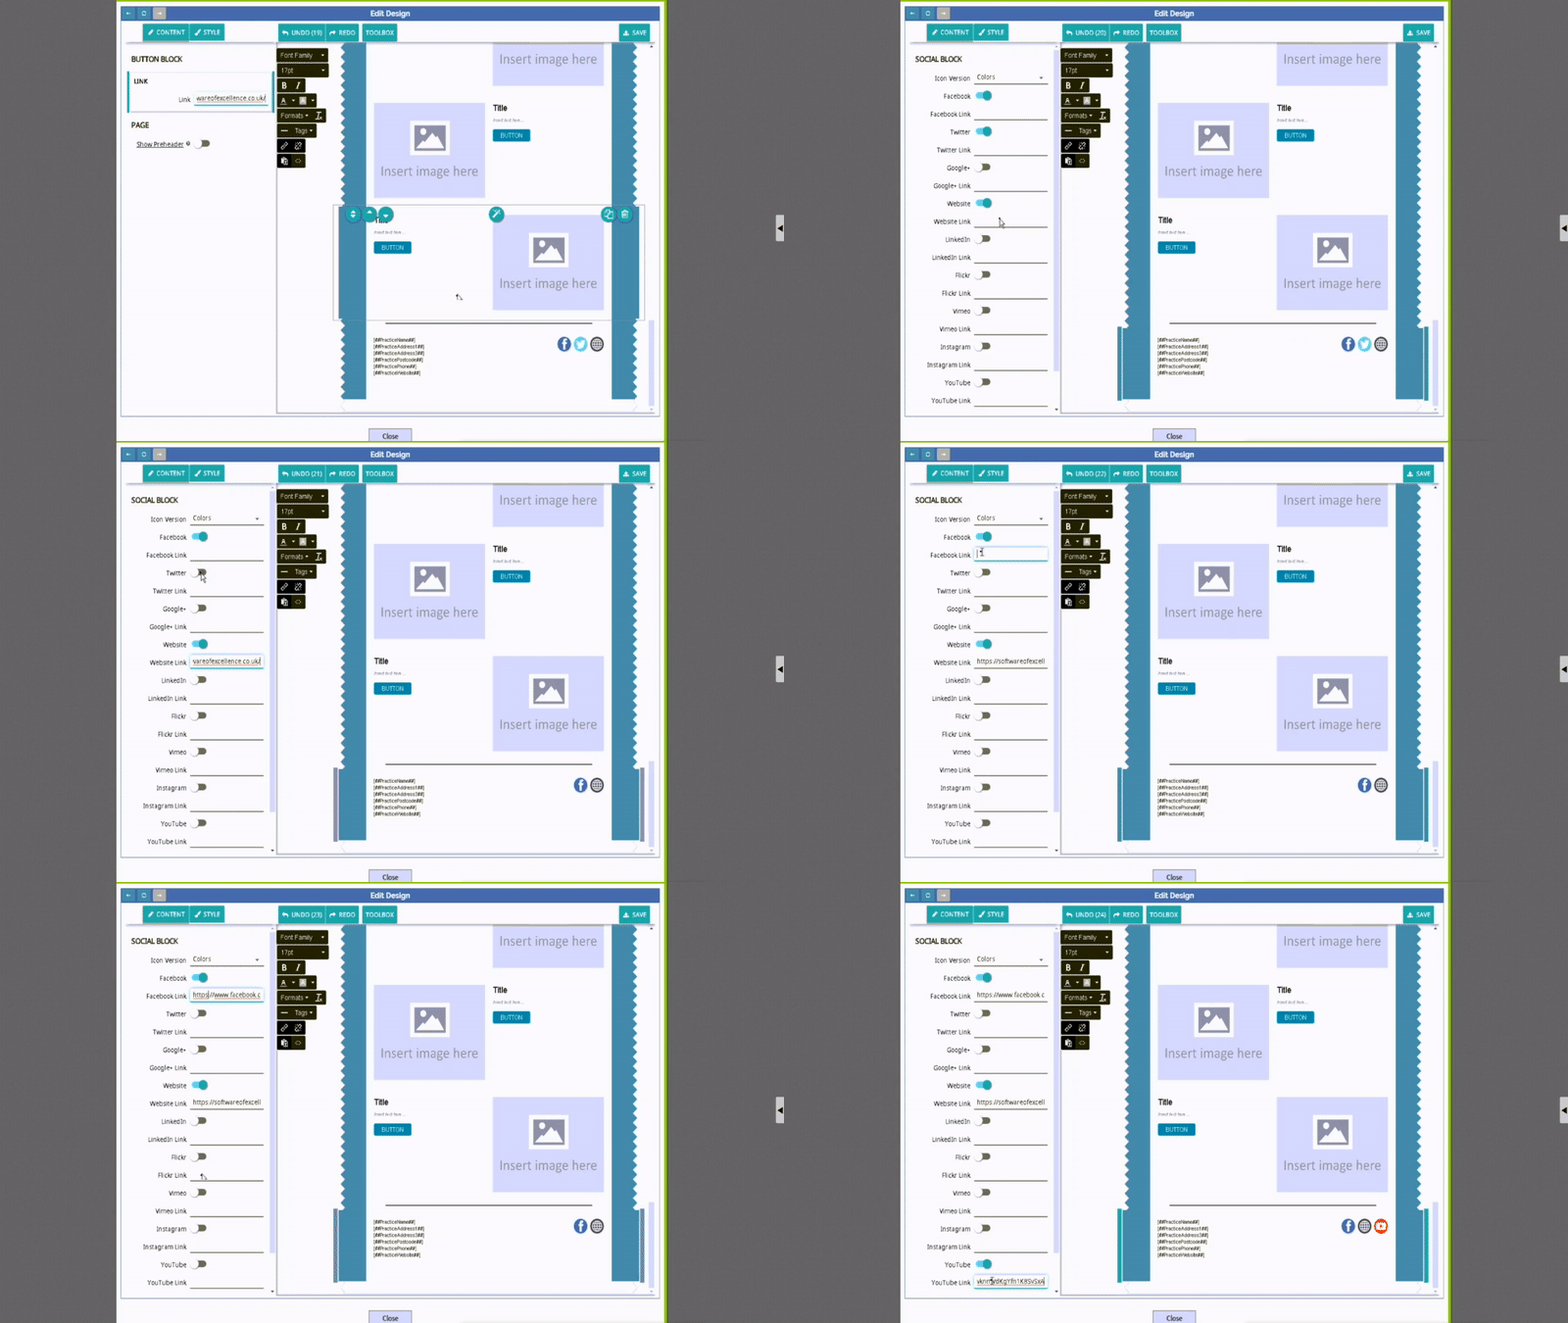
Your footer bar will automatically have your practice address, phone number and website address merge fields included. You will not need to add these. You will also see social media buttons as shown below.
Toolbox options
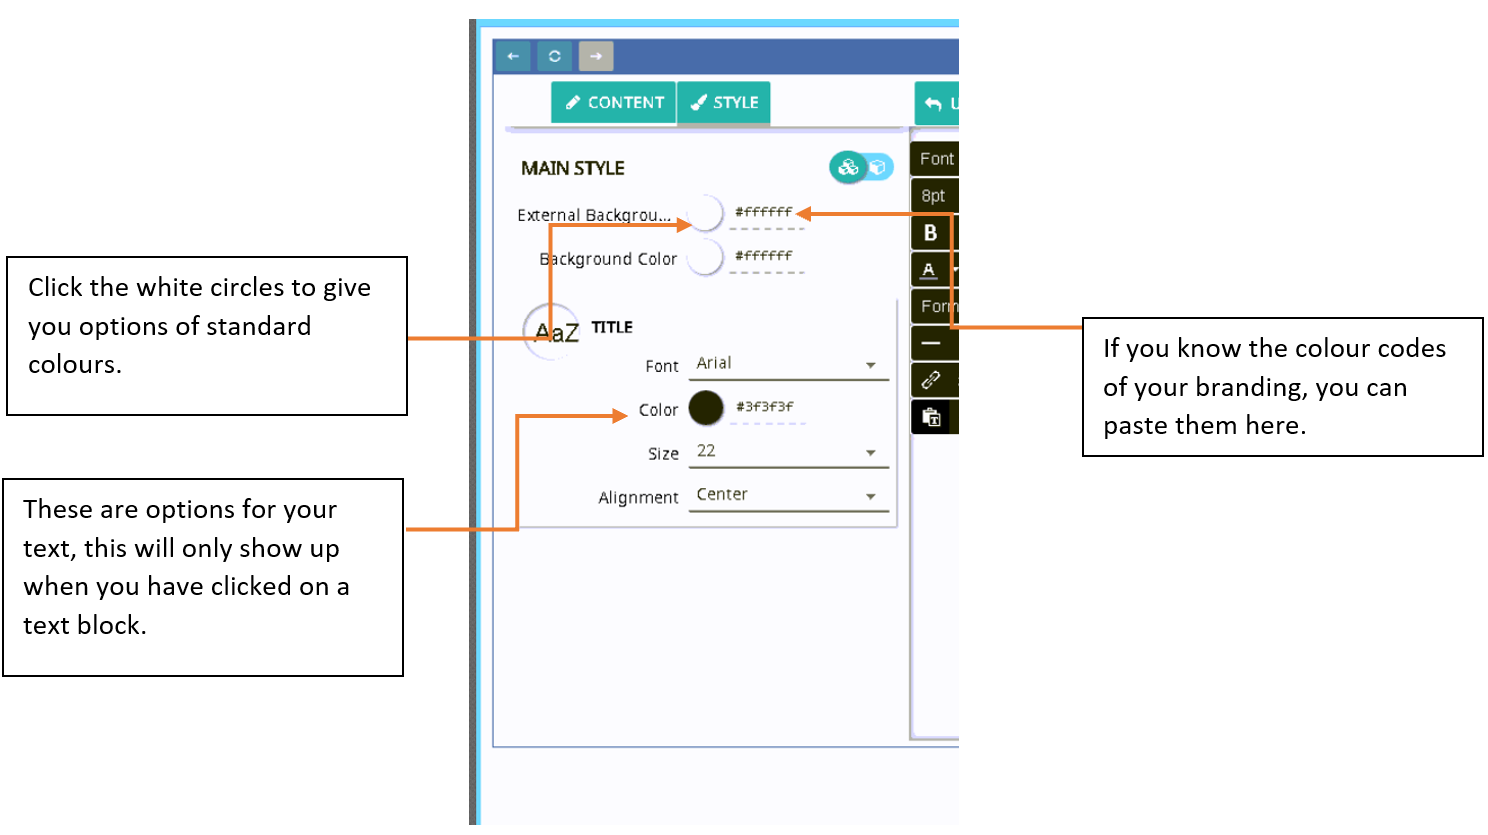
Under the style option of the toolbox, you can change the colour of the email background.
You may know the colour coding of the colours for your branding and you can add these as shown below.
 Finishing your template
When you are happy with your template design, click the ‘Save’ button in the top right hand corner. This will show you a preview version of the email template, allowing you to proofread. All the merge fields used in the template will pull through so you can check these have worked.
You will need to pick a email subject for the template. This is what patients will see before they open the email.
Scroll to the bottom of the page.If you want to change anything, click the ‘Edit again’ button to go back to the previous page.
You can also send yourself a test email so you can test any URL links. We recommend sending one test to a desktop email and one to a phone email. This will allow you to check how the formatting of the email looks on the different systems.
If you need to come back to your template another time, you can click the ‘Save’ button at the bottom of the page.
|
If you are ready to set the campaign to send press the ‘Approve’ button. This will lock the template into the campaign and we cannot make changes after this. |
You will be taken back to the campaign dashboard and it may come up as ‘not responding’ for a minute or so whilst it uploads your template to the dashboard. EXACT has not crashed so please do not close the campaign.

Comments
0 comments
Please sign in to leave a comment.