How To Use Mounts Within Examine Pro

The Mounts Screen
The icon below will bring up the initial mounts screen, where you are able to create\edit any mount layouts on the system:
 - Mount FMX Icon
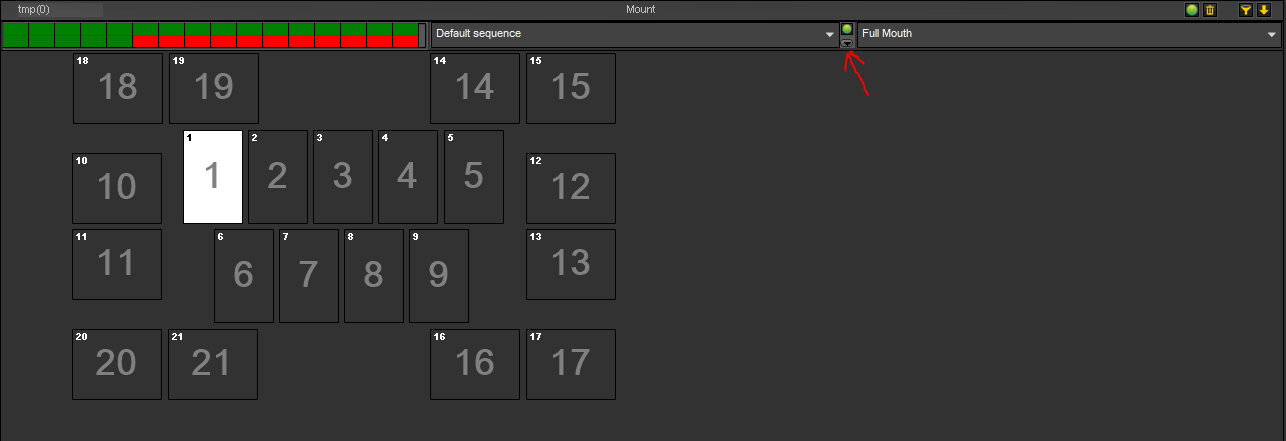
The screenshot below shows the Mount FMX window which will open when the Mount FMX icon is selected:
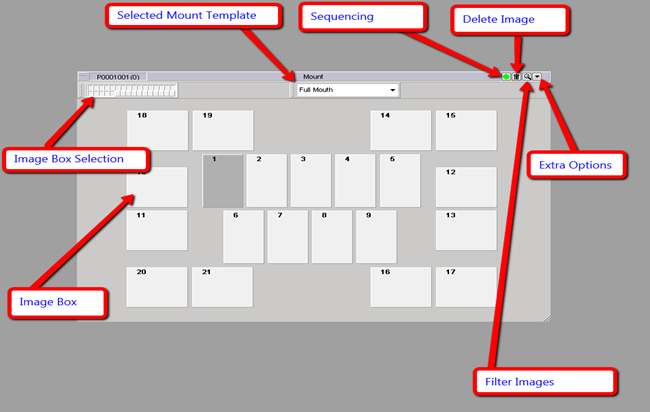
Description of Each Section Shown Within The Mount FMX Window
Image Box – A box shown within a Mount FMX that can store 1 or more images
Image Box Selection – The number of Image Boxes that are shown on one Mount FMX
Selected Mount Template – Drop-down box that will show the selected Mount FMX
Sequencing – Option for the acquisition stage that allows for images to be automatically assigned to an Image Box
Delete Image – Delete an image selected within an Image Box
Extra Options – Options that will be selected for the setup of new Mount FMX layouts
Filter Images – Filter the images shown on a Mount FMX layout
Creating A Custom Mount FMX Layout
Please note that when you create a custom layout it must be created on each workstation it is required on.
To create a custom Mount FMX Layout use the following procedure:
Click the Mount FMX icon to open the Mount FMX window
Select the Extra Options icon
Select New Scheme
Enter a name for the scheme
Select the number of Image Boxes required via the Image Box Selection icons
Ensure the desktop is unlocked
Select Display à Desktop Panels and ensure Lock Desktop is unticked
Use the horizontal markers in the top left of each window to move each Image Box into its required position
Select the Extra Options icon
Select Save Changes
Assigning An Orientation To An Image Box
It is possible to automatically assign an orientation to an Image Box and to do this, use the following procedure:
Select the Mount FMX layout
Select the Image Box you want to assign an orientation and tooth notation to
Select the Extra Options icon
Select Image Associations - the window to the below will appear
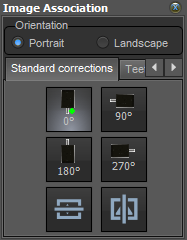
Select the orientation desired
Select the position of the sensor
Select whether a mirror of the image will be required at acquisition
Once the correct orientations have been selected click back onto the image box to save the changes
Assigning A Tooth Notation To An Image Box
It is possible to automatically assign a tooth notation to an Image Box and to do this, use the following procedure:
Select the Mount FMX layout
Select the Image Box you want to assign an orientation and tooth notation to
Select the Extra Options icon
Select Image Associations
Select the Teeth Chart tab
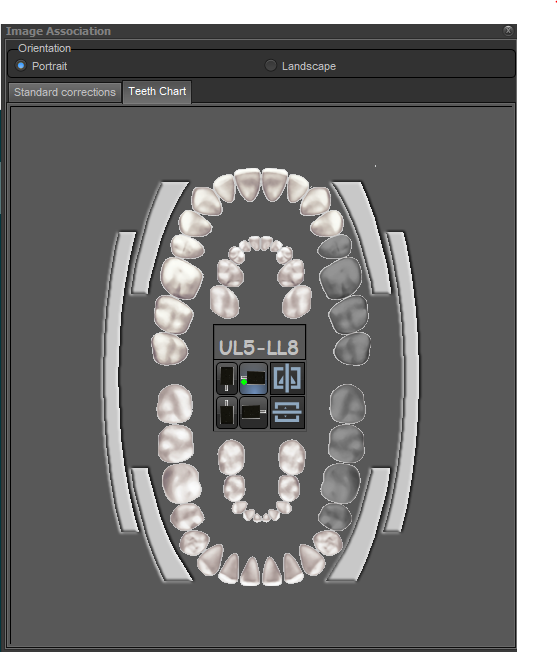
Select the tooth notation that is required
Once the correct tooth notation has been selected, click the Image Box again to save changes
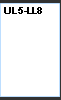
The Image Box should display the tooth notation, as shown in the below example:
Adding Existing Images To A Mount FMX Layout
To add existing images to a Mount FMX you can simply click the Mount FMX icon and drag the images from the image library up to the required Image Box.
Once you have dragged the images to each of the desired Image Boxes you must click the Mount FMX button again to save the changes. The icon will then have a green outline to indicate that a patient has a saved Mount FMX layout.
Please note it is possible to drag more than one image to an Image Box
Acquiring Xrays Using The Mount FMX
It is possible to develop x-rays and have them directly enter a mount layout to do this you must select the Xray Acquisition FMX icon.

Setting Up A Sequence To Develop Xrays Through Xray Acquisition FMX
When you use the Xray Acquisition FMX icon to acquire x-rays it is possible to set up a sequence so x-rays are stored directly into the correct Image Box when they are acquired in the correct order, to do this use the following procedure:
Select the Xray Acquisition FMX icon
Part of the window will show the screen below:
Select the arrow highlighted
Select Add\Record Sequence from the drop-down menu
Give the sequence a name
Click OK to the message that appears
Click into each Image Box in the order you would like the images to be acquired onto
When finished click the ESC key on the keyboard
Click OK to the message that appears
Fullscreen Mount Icon
Within Examine Pro there is also an icon to view a created mount for a patient full screen. Within this screen, you are able to export the Mount FMX as a bitmap file (possibly for email purposes) or print the Mount FMX off of the printer setup.
Comments
0 comments
Please sign in to leave a comment.